Creating an Instance
Welcome to the user guide for creating instances on cloud computing. Cloud computing has revolutionized the way businesses and individuals deploy and manage their computing resources. This guide will walk you through the process of creating an instance on Eranyacloud console.
This guide is designed to help you understand the fundamental steps involved in setting up an instance. By following this manual, you’ll be able to harness the power of cloud computing to meet your specific computing needs.
Getting Started
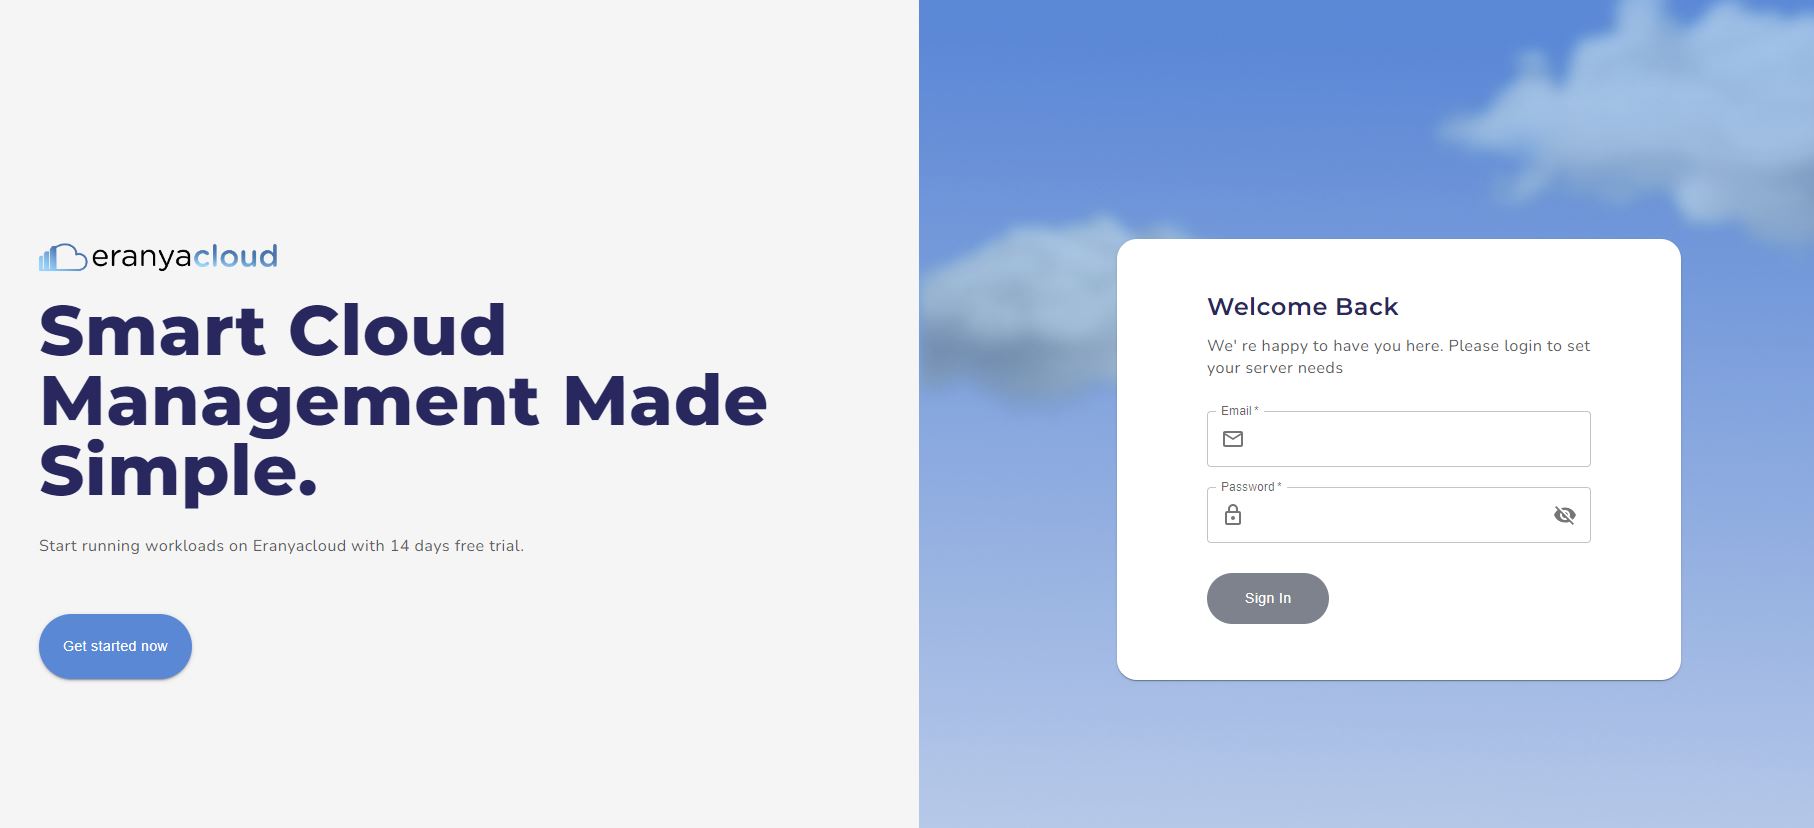
- Login to Eranyacloud portal using registered account (email & password)
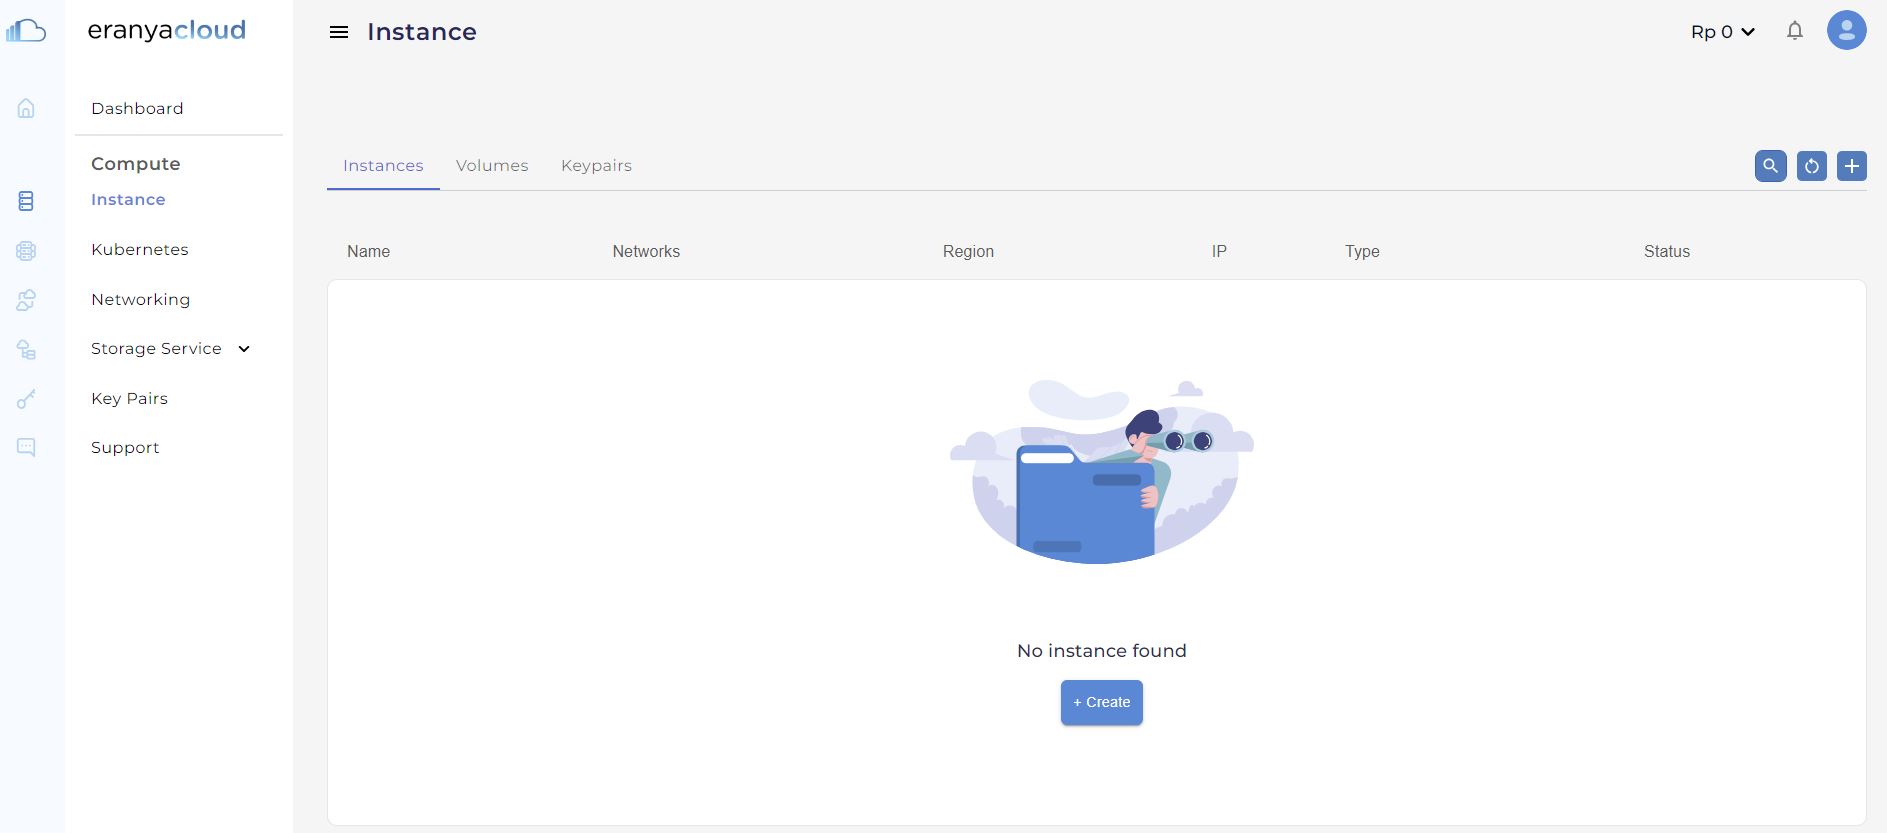
- On the Service Portal account dashboard page, navigate to the left menu and click on Instance
Launch Instance creation Wizard
- Once the Instance module dashboard is opened, click the +Create button to start creating Instances
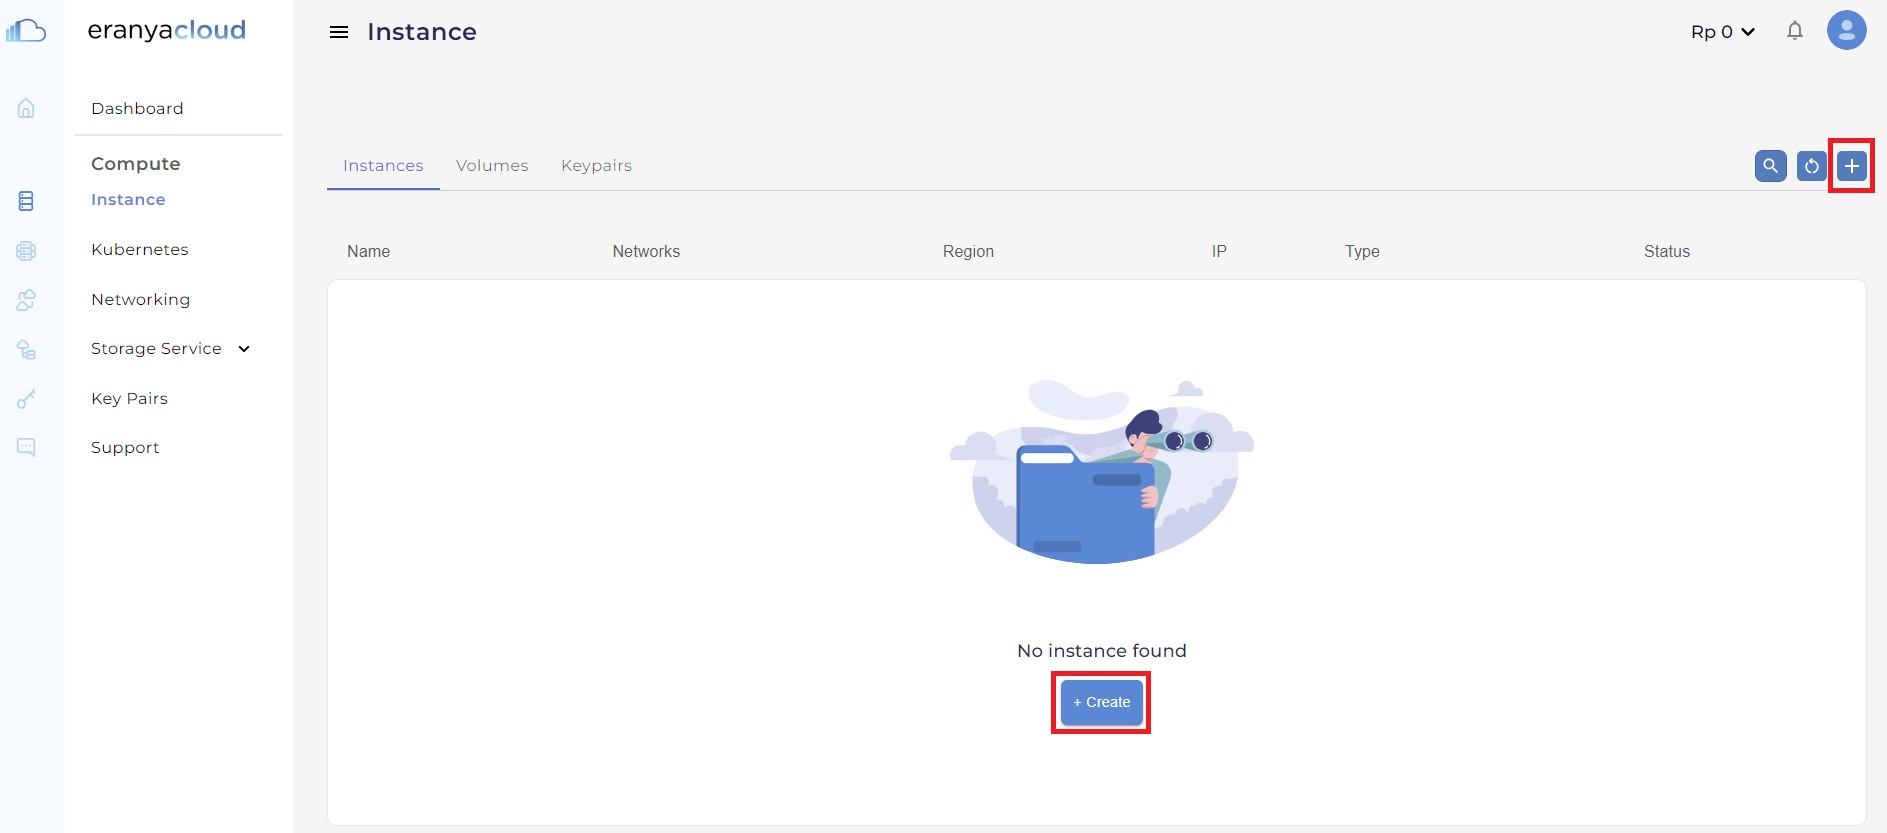
Step 1 – Instance name
- Name your instance. The hostname is also set from the selected name during the initial creation.

Note: Summary will be displayed on the right pane reflected on the user input. Click on ‘Next Step‘ button to procced.
Step 2 – Region
- Choose a data center Region.
- Select one of the data center provided by us.
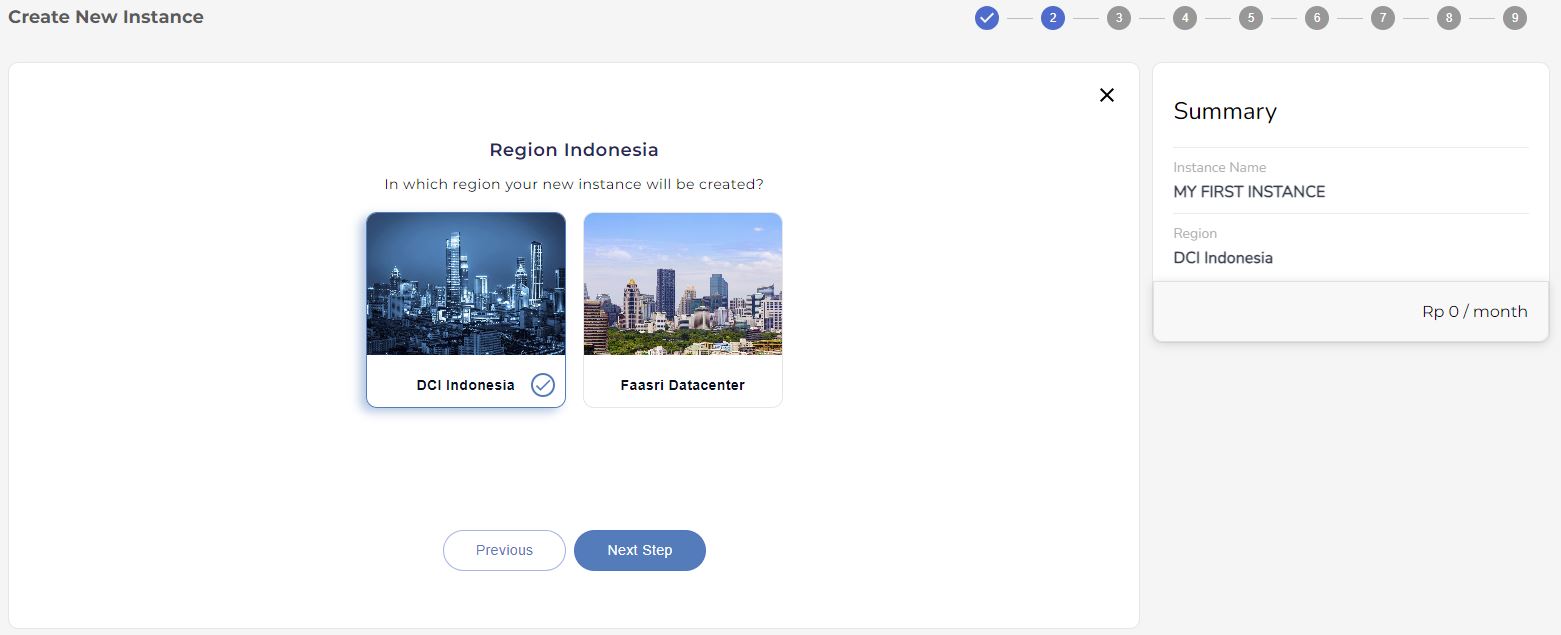
There are 2 locations available to choose: DCI Indonesia and Faasri Datacenter. Click on ‘Next Step‘ button to procced.
Step – 3 Choose Image
- Select the operating system you want to use, such as Linux or Windows. You may have the option to choose from various OS versions.
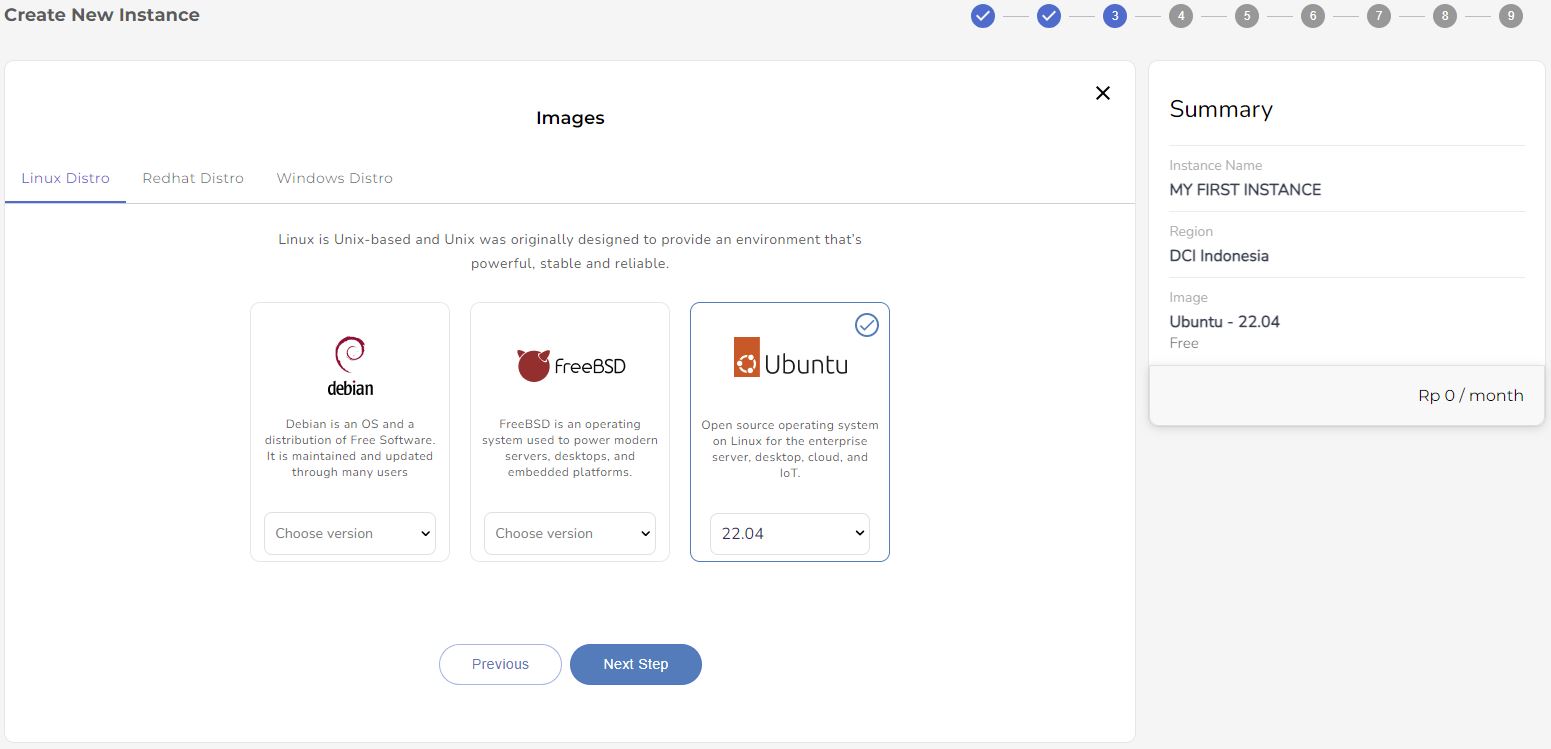
Note: Details image with its price/month displayed on the summary page on the right pane. Click on the ‘Next Step‘ to procced.
Images
We offer a wide variety of different distribution images you can use for your Instances, as listed below.
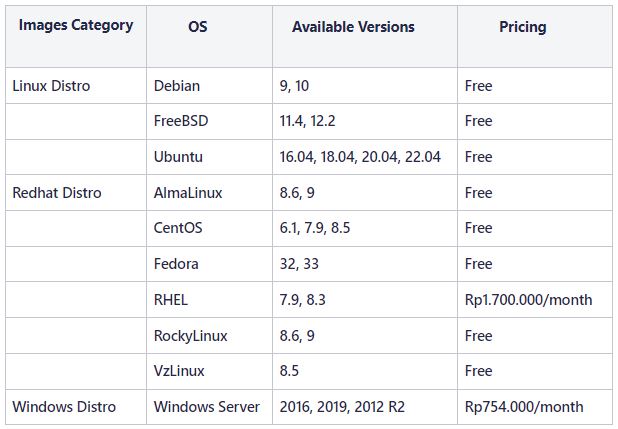
Step 4 – Flavor
- Choose the configuration (flavor) for your instance that determines its vCPUs, vRAMs, and Prices.
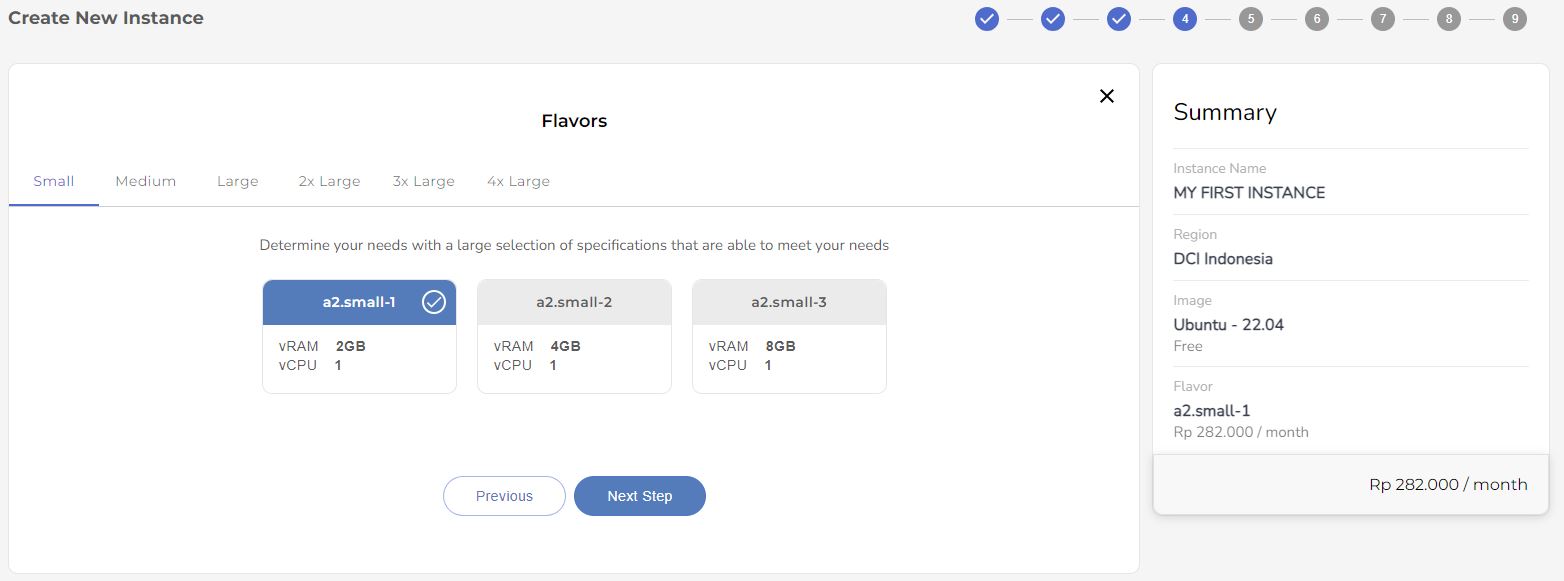
Pricing for each of Flavor can be found here: Pricing list
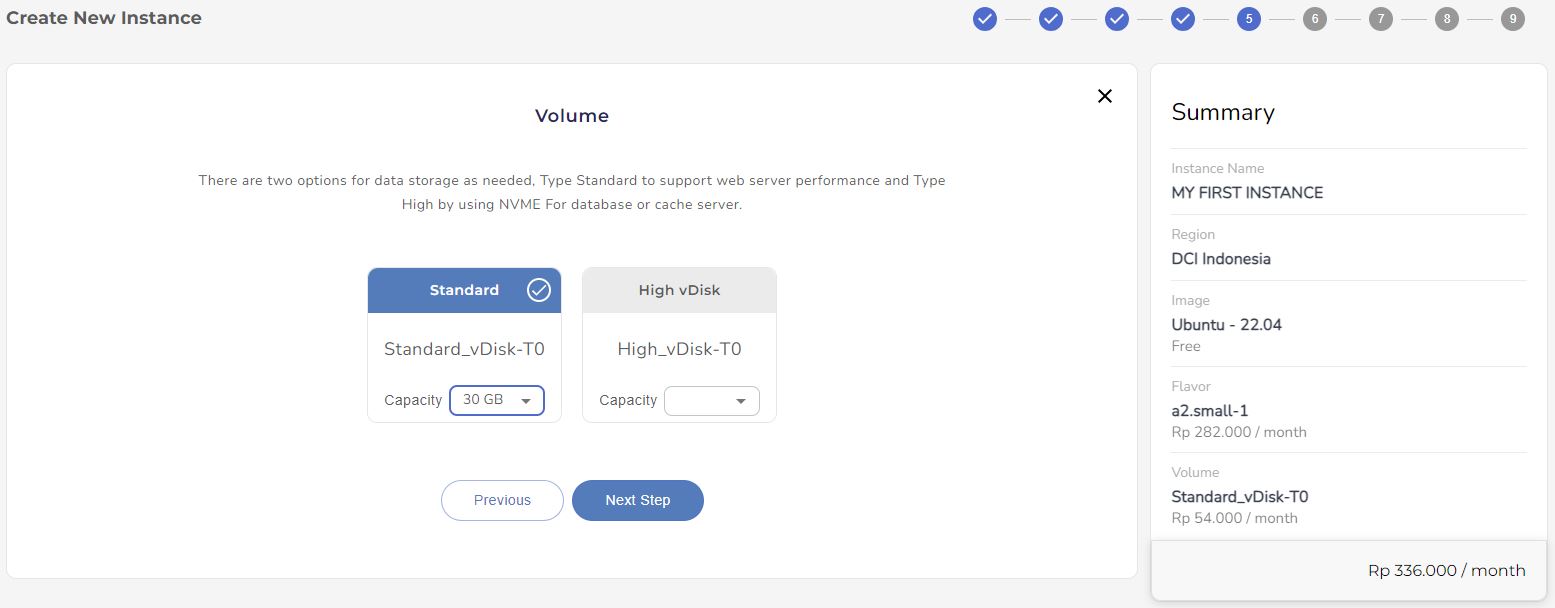
Step 5 – Volume
- Choose the volume of your instance by selecting High vDisk and Standard volume as provided by the system.
- You can also choose the capacity from 30GB – 300GB (Linux) and 100GB – 300GB (Windows)
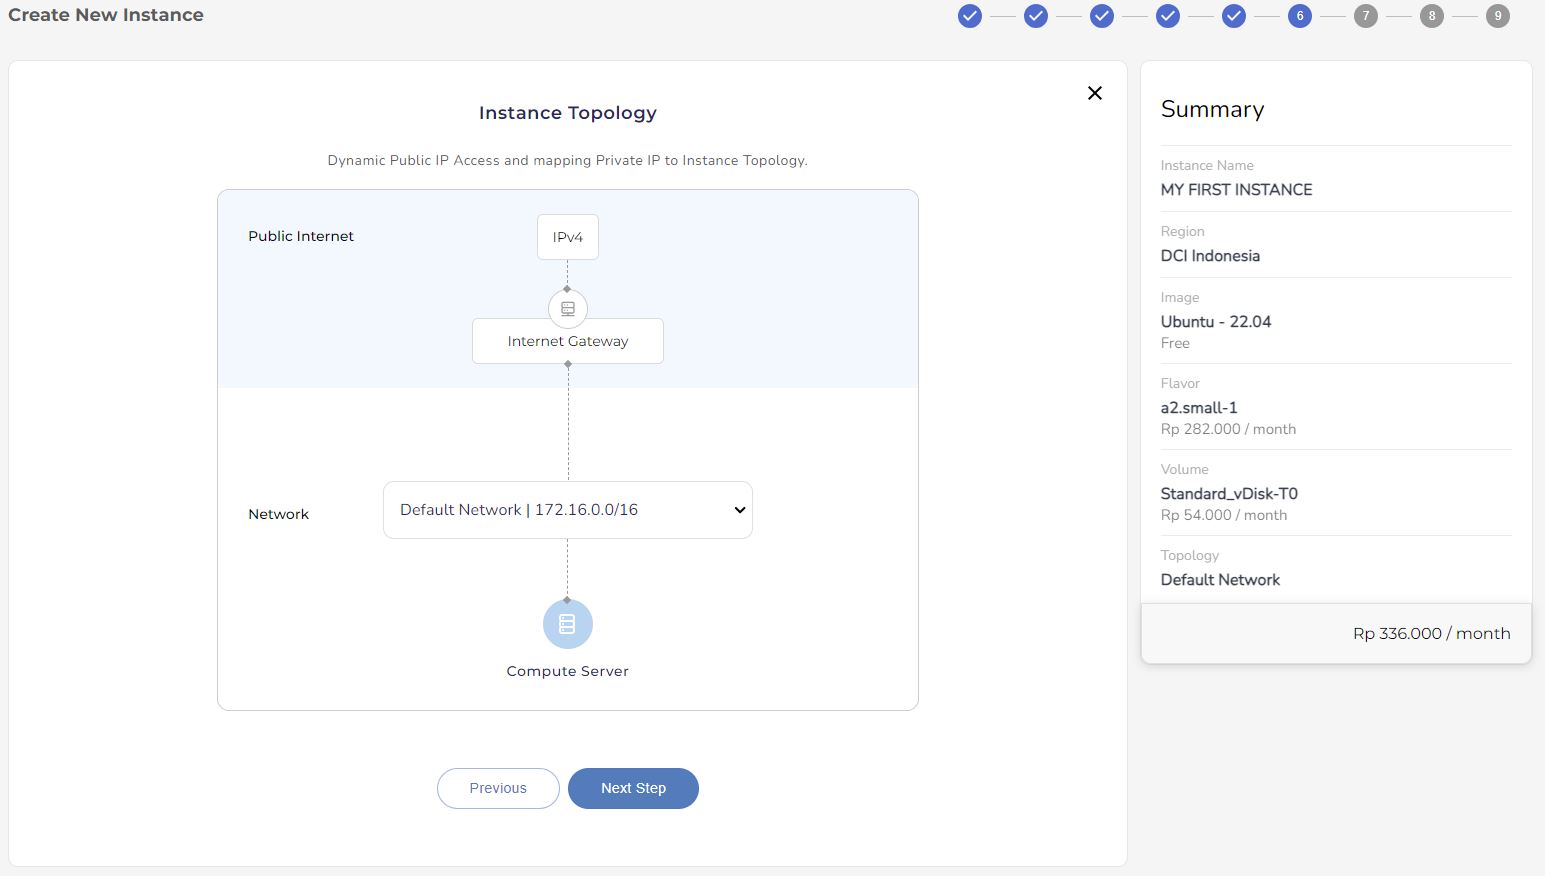
Step 6 – Instance Topology
- Confirm the instance topology. If you have more than one Private Network, you can select the one you want. By default, each instance is assigned an Elastic IP address and is reachable via the Internet.
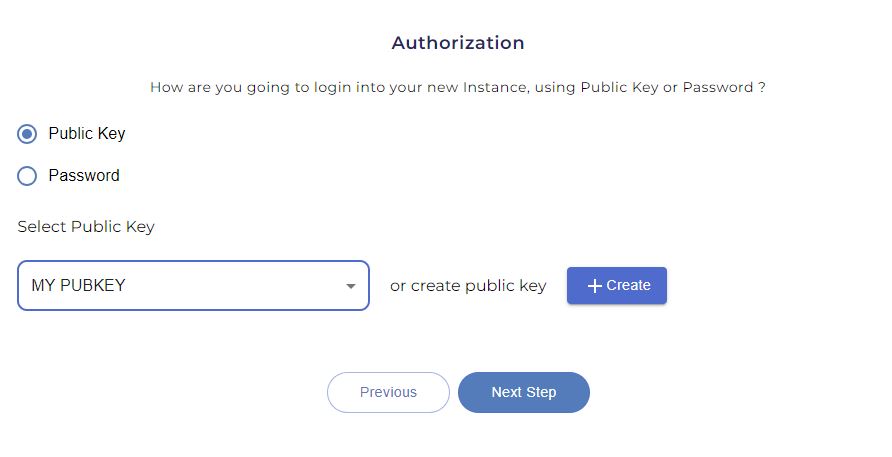
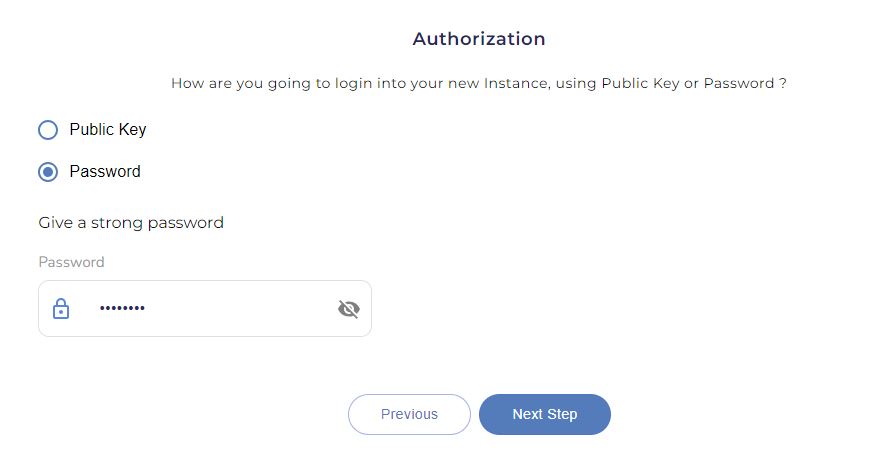
Step 7 – Authorization
- Public Key
- Select an existing Public Key or create a new one by clicking the (+) Create button.

- Select an existing Public Key or create a new one by clicking the (+) Create button.
- Password
- Specify a password for the Administrator user account

- Specify a password for the Administrator user account
Step 8 – Managed Service
There are 4 Managed Services you can choose:
- Basic Managed Service
- Advanced Managed Service
- Enterprise Managed Service
- No Managed Service
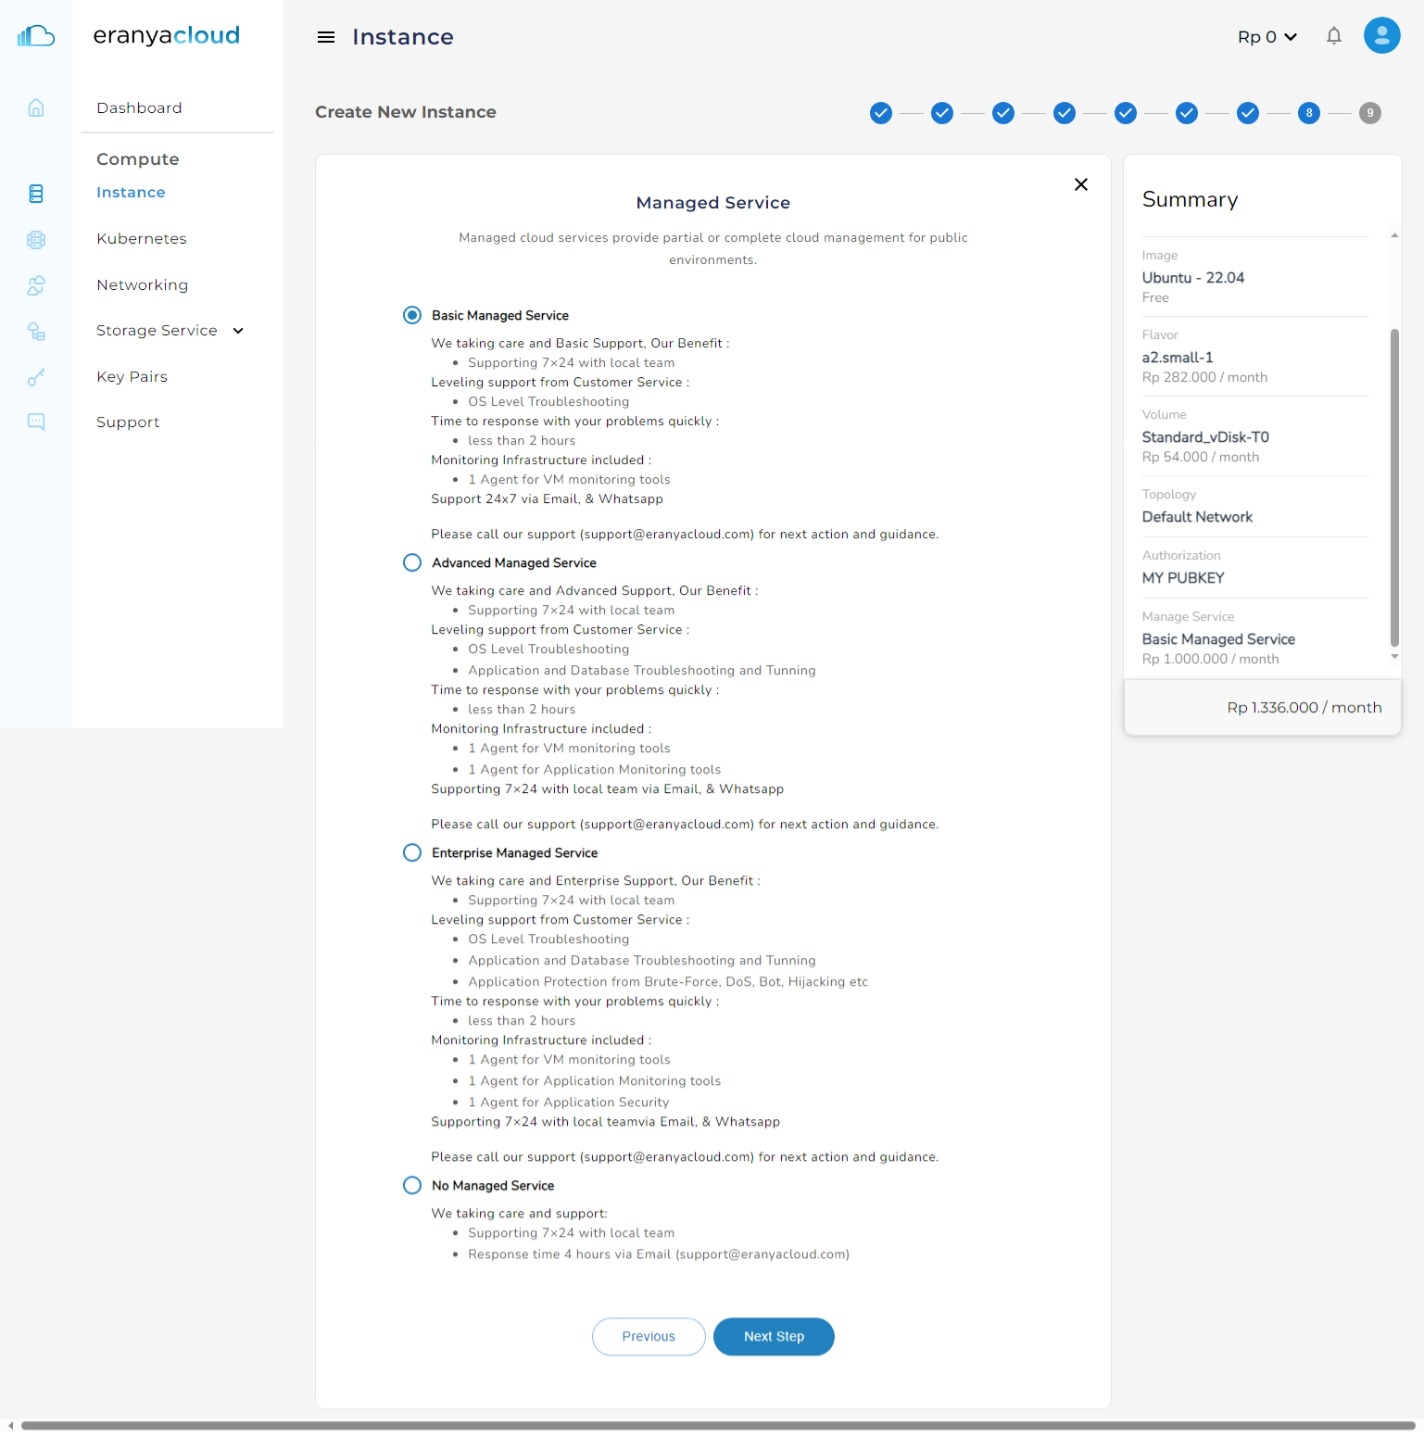
Select one of the services and click on “Next Step”
Step 9 – Summary
- Double-check all the settings you’ve configured to ensure they match your requirements.
- Once you’re satisfied with the configuration, click the “Finish” button. This will initiate the instance creation process.
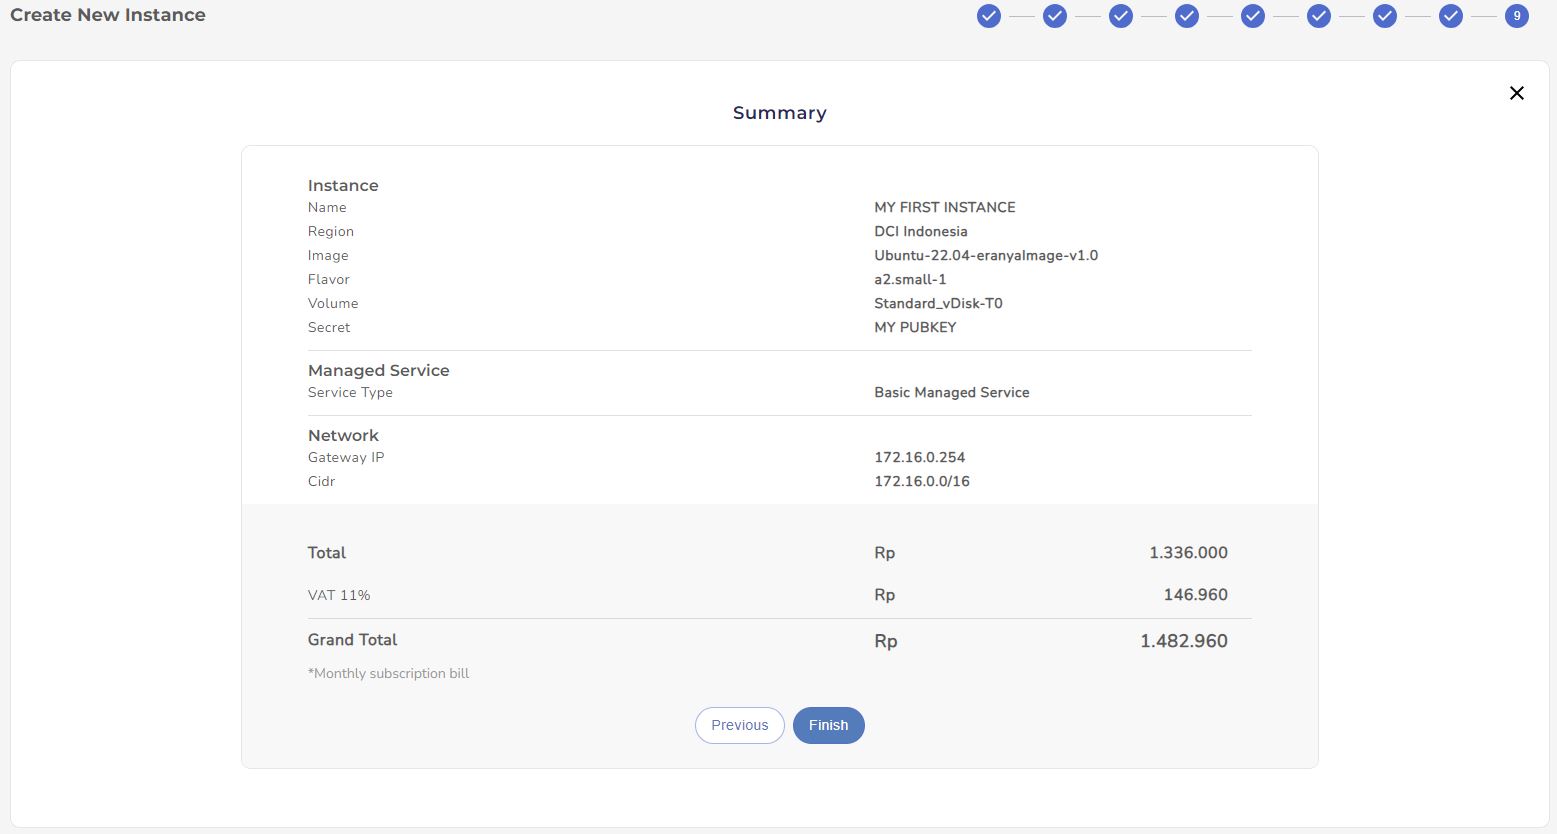

Congratulation!! You’ve successfully created an instance on Eranyacloud console! You can now connect to your instance. Enjoy using your cloud instance for your computing needs.
Table Of Content

